Fans of upcycling garage sale or thrift store finds may discover lots of unique pieces on their digs. Things like ugly upholstery hues sometimes make the difference between a must-have and a hard pass. Oftentimes, the amount of fixes necessary to bring those furnishings back to some semblance of their original glory just aren’t worth the time and expense.
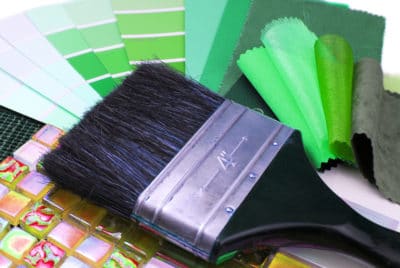
Fortunately, painting fabric with Real Milk Paint can help you transform unacceptable upholstery into eye-catching home accents. Our nontoxic fabric medium mixed together with fabric paints come in a vast array of colors to ensure beautiful results ideally suited to your home’s interior design palette. You can paint fabric using Real Milk paint with a brush, sponge, or even a stamp.
If you’re seeking the benefits of this fabric painting technique or looking for a step-by-step tutorial, read on to learn the basics of mixing, application and aftercare of paint on fabric.
Advantages of Fabric Painting
One key advantage of painting upholstery fabric with milk paint is that it eliminates the need to reupholster chair seats or sew covers to fit them. While you can sometimes remove upholstered cushions on DIY pieces, in cases where you can’t, Real Milk Paint to paint upholstery still makes a good option so long as you can tape off spaces where you don’t wish to paint fabric.
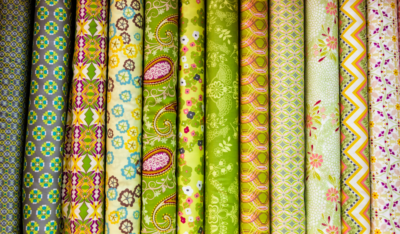
In addition to chair makeovers, painting fabric with milk paint also works well for everything from revamping old throw pillows and dressing up tapestries to fabric dye napkins to match your kitchen and creating painted fabric masterpieces on canvas. Though you may have to experiment to get the right technique for your material, Real Milk Paint stays put over fabric permanently when applied correctly.
Fabric Painting Tips
Achieving the look you want by painting fabric with Real Milk Paint is simple when you know fabric paint tips and tricks. Some of these are basic, like making sure to check the color of your fabric dyes by first painting an out-of-sight portion of your piece.
Testing like this also proves very helpful when deciding the Real Milk Paint-to-water ratio you need to use to paint fabric. While it typically mixes 1:1 for the first coat and 2:1 for the last coat, you may find you need to tweak your fabric paint formulation to get the ideal consistency.
Additionally, painting canvas fabric requires no Ultra Bond adhesion promoter, so knowing your fabric fibers properties can help you save money on supplies. You may also want to check out our paint color mixing guide to get the exact shade you want for your painted fabric and furniture.
Painting Fabric with Milk Paint
The first step in painting fabric with milk paint is gathering the supplies you need for your DIY project. In addition to Real Milk Paint and a container and water for mixing, you can have a drop cloths for cleaning or tapes and fabric markers for complicated designs such as floral pattern. This project also requires paint adhesion promoter to ensure the fabric medium maintains color and bonds with your fabric.
Next, you need soft bristled brushes such as a Blue Tip paint brush by the Real Milk Paint Co. to aid in fabric paint application. Be sure to have both larger and smaller paintbrushes on hand so you can get fabric paint down into every crack and crevice for even coverage. Also, you need a spray bottle full of plain water, a 300- to 400-grit sanding block and clear wax to seal the paint once it dries.
Now that you have everything together, mix our Real Milk Paint powder at a 1:1 ratio with water using a paint brush, add the recommended amount of Ultra Bond, then let it settle for 10 minutes so the pigments fully dissolve, which ensures more even coverage. While waiting, use masking tape to tape off the portions of your painted fabric project piece that you don’t wish to paint. When you finish with that and your milk paint has settled, mix it again for a full minute to distribute the dissolved pigments evenly throughout the fabric medium, then lightly mist the fabric you’re painting with plain water. Now you can grab your brush and start painting upholstery or fabric.
Work the thin mixture quickly into the upholstery fabric to ensure thorough coverage, then wait for it to dry on your piece of furniture. You may be a bit frightened by the look of your DIY paint fabric project after a single coat, but don’t despair — extra coats enhance the opacity of the fabric paint color you chose and eventually conceal the original fabric color entirely. Be sure to wait 24 hours to give the paint on fabric ample drying time between coats. Sanding between coats with the sanding block you gathered helps you smooth out rough areas and readies the surface for the next coat and the next.
To complete coverage, consider making your last coat of Real Milk Paint one mixed at a 2:1 ratio with water and more Ultra-Bond. Once this final coat dries for 24 hours, you’re ready to seal your DIY paint fabric project the same way you seal acrylic paint to help it hold up well to use and time. To apply a top coat, you need clear soft wax paint sealant by the Real Milk Paint Co. and a brush designed for sealer wax application. Apply the sealant liberally, wiping away any excess as you go, and make sure to get it deep into grooves and recessed areas to prevent cracking and chipping. Now your home decor project is complete and ready to take center stage in your living room, bedroom or den.
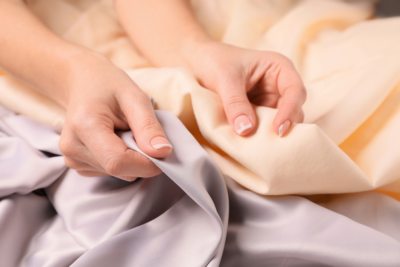
Dyeing Fabric with Milk Paint
Besides working great for upcycling old furniture such as dining chairs and upholstered wood furniture, Real Milk Paint also makes a great choice for dyeing fabric. To do fabric dyes, you need milk paint powder, water for mixing, a big bucket and a stick to dunk your project. Mix the Real Milk Paint with water at a 1:1 ratio in the bucket, stir it and let it settle while you grab the pre-wash items you wish to fabric dye and then simply stir them into the mixture, let them soak, then hang them in a safe spot to dry. This technique works great when you want to customize kitchen essentials such as cotton napkins and placemats .
Fabric Painting Aftercare
Unfortunately, painting fabric with Real Milk Paint doesn’t ensure washability, especially if you are planning to use fabric softener. Because Real Milk Paint is a water-based formulation, introducing more water once dry may make colors bleed. If you find your color fading or cracking over time, just mix up a new batch of Real Milk Paint, clean the surface thoroughly, then cover the upholstery with a fresh coat of Real Milk Paint.
While using acrylic paint, latex paint or chalk paint for a furniture makeover that includes upholstery proves pretty common, painting fabric with Real Milk Paint is one technique that’s not been fully explored by many DIYers. The nontoxic, natural formulation, though, makes it an attractive choice for numerous fabric painting crafts, from armchairs for your dining room and loveseats in your living room to throw pillows in your bedroom and tapestries in your den. With that in mind, consider upping your do-it-yourself skill set by saying goodbye to acrylic paints and mastering the art of painting fabric with Real Milk Paint.


