Furniture Painting for Beginners
Knowing how to paint furniture is a useful skill to have when you want a specific piece of furniture you can’t buy ready-made. Whether you want to makeover garage sale accent tables with Real Milk Paint, cover a handmade Adirondack with a outdoor latex paint or dress up kitchen cabinets with chalk paint, our furniture painting for beginners guide walks you through the process by explaining each step, from gathering your DIY supplies and prepping the surface to applying paint and adding a top coat. Before you get started using our tutorial, however, you need to select the furniture you wish to paint and decide on the look you desire.
Selecting Furniture to Paint
Even if you already have a piece of furniture in mind for a makeover, options for future DIY projects abound once you get the hang of painting furniture. Handmade bare furniture offers the ideal surface for a new paint job, while existing wooden furniture such as nightstands and dining room buffets offer forgiving surfaces for learning brushstrokes and experimenting with paints to see which ones have the best adhesion. Small pieces with tight crevices work well when you want to try your hand at distressing, while larger items offer opportunities for speedy coverage with spray paint and paint sprayers.
After you get the hang of refinishing and painting wooden furniture, consider searching out new projects on Craig’s List, Facebook Marketplace, or local sales websites. Many buy/sell/trade websites let you set up alerts if there’s a specific piece of furniture you wish to add to your home. Additionally, garage and estate sales typically feature a treasure trove of unique furniture for painting projects by hobbyists and professionals alike. Free pieces found curbside on trash day provide you with excellent practice material for painting projects that explore techniques such as crackling and chipping.
How to Paint Furniture
Use this DIY project tutorial as a complete furniture painting for beginners guide. Before you bring in the furniture and slap on a coat of paint, be sure to put down a drop/painters cloth down in your work area to prevent splashes and drips from marring the look of your space.
Gathering Furniture Painting Supplies
Having all your supplies together helps you quickly complete your DIY projects, and that makes it important to have the paint colors and the amount of paint necessary for the paint job on hand. Additionally, you need the prep and painting tools required for the techniques you plan on using. Basic supplies to gather for painting furniture include:
- Chalk, latex or milk paint
- Paintbrushes
- Foam rollers
- Paint sprayer
- Medium grit or fine grit sandpaper
- Scrapers or putty knives
- Wood cleaner
- Wood filler
- Masking tape
- Shellac
- Clean, dry rags
- Mixing and cleaning buckets
- Top coat
- Specialty finishing products
Prepping Furniture for Painting
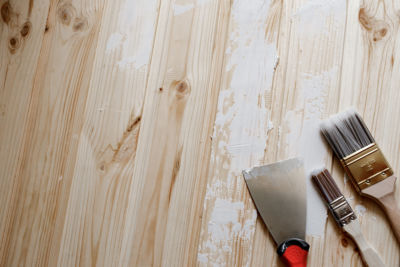 Prep work can make or break your painting project, so attention to detail in this step pays off. Different DIY paint jobs require different treatments. For instance, a bare wood piece of furniture typically just needs a wipe-down with high-quality Tri-Sodium Phosphate or Odorless Mineral Spirits by the Real Milk Paint Co. and then you can start painting. Items that just need a fresh coat of paint usually require only a bit of sanding with fine to medium grit sandpaper before you repaint them. Make sure to clean and remove sanding dust after to make paint adhere to the piece with a smooth finish.
Wooden furniture with several previous coats of paint or varnish may need scraping to remove any built-up layers and attached hardware, and you may even want to remove all previous paint with Soy-Gel Professional Paint Remover or Milk Paint Remover to ensure a smooth, even decorative surface. If you’re painting furniture with holes or gouges, be sure to level out those divots with wood filler before you begin, and if the wood has iron stains, remove them with Oxalic Acid Wood Bleach. If there’s a drastic difference between leftover varnish and the wood surface beneath, you may want to cover the lighter area with shellac to reduce color variations in your final results.
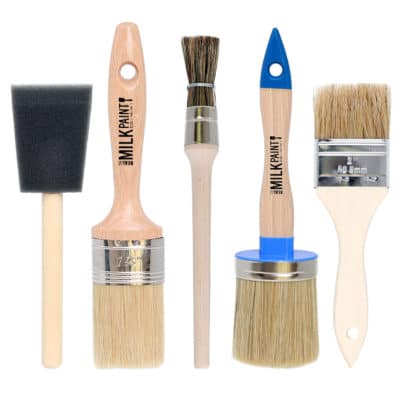
Mixing Paint and Selecting Paintbrushes
 Now that your prep work is complete and the wooden furniture has dried, you’re ready to mix your paint and decide on the paintbrushes to use. If you have chalk or latex paint, that means shaking it up and stirring it thoroughly with a paint stirrer. Since most milk paints come in a powdered form, you need to mix it up with equal parts water and powder and stir it thoroughly.
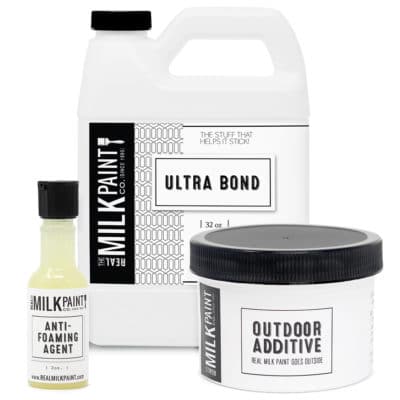
All-natural milk paints such as Real Milk Paint tend to bubble when mixed, so if you don’t want to wait 15 minutes before you start, add our Anti-Foaming Agent to your paint colors. For wooden furniture you wish to place on your patio or porch, consider our Outdoor Additive to keep pesky knots from bleeding through your paint job, and for items covered in glossy paint or polyurethane, try Ultra Bond Adhesion Promoter to ensure lasting results.
Different paintbrushes offer different effects. For example, if you want to achieve a smooth look free of brushstrokes, choose foam brushes or foam rollers. When you want a more rustic look that showcases various brushstroke techniques, select high-quality paintbrushes such as our Blue Tip Brushes. For adding quick base coats, our basic Chip Brushes provide an economical tool you can use over and over again in your DIY projects.
Here’s a quick video tutorial on how to paint furniture:
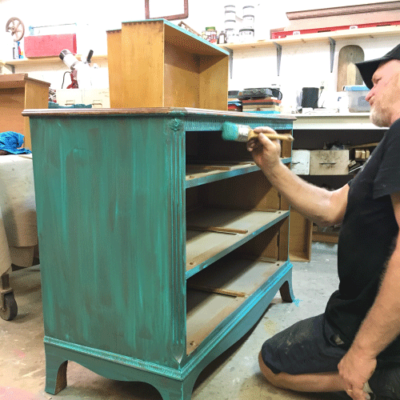
Painting Your Piece of Furniture
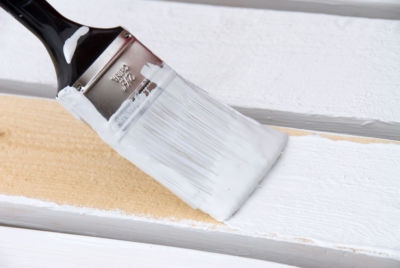
Now that you’re ready to add your first coat of paint, begin by brushing it on in a single direction to evenly cover the surface. Whether you’re using satin, semi-gloss, flat or matte paint colors, be sure to work with thin coats and lightly sand between coats to get even finish. Also, get your paint brush into every crack and crevice to ensure a smooth base coat. If you’re painting a larger piece of furniture, focus on smaller sections until you cover the entire piece. For best results, paint from one end of the surface to the other end then gradually fill the piece from back to front. This allows your brush marks or strokes to look even across the surface rather than sectioned off. Once you’ve finished, allow the first coat to dry and gauge the coverage.
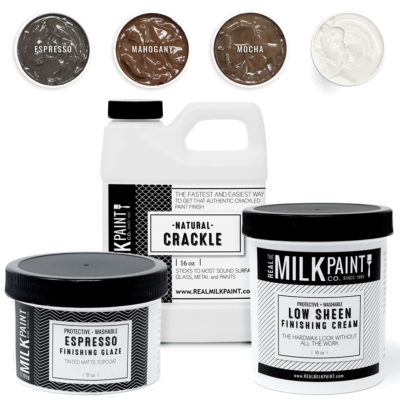
If you are looking to add a special effect to your piece, between coats is the best time to do that. Imbue your paint with rustic appeal by applying Natural Crackle Paint Finish. Chippy Paste helps you achieve controlled distressing for a farmhouse-fresh look suitable for pairing with country-style decor. Both of these give you the ability to create a two-toned look where one color shows through the other.
Once it dries completely, it’s time to apply the second coat, working in the same fashion as the first. Most pieces require only a couple of coats, but if you feel like you need more coverage, apply a third as needed.
Adding Finishing Touches
 After your wood furniture paint job dries, it’s time to add any finishing touches before adding a sealer or top coat. Add our
Finishing Creams around carved elements to give your piece of furniture an air of timeless grace. You may also consider other distressing techniques such as sanding and wire brushing when you want a more pronounced antiqued effect on your painted furniture. Once you get the look you want, use a paintbrush to cover the surface in a top coat suitable for the medium you used, such as polyurethane for latex paints or furniture wax sealers by the Real Milk Paint Co. for surfaces covered in chalk or milk paints.
Knowing how to paint furniture makes it simple to upgrade old pieces in your home, upcycle items you find on the cheap or refinish wood furniture for clients. No matter your painting project, the Real Milk Paint Co. has the tools, supplies, colors and finishes you need for excellent results. Visit our tutorials and videos page for more DIY guides and project ideas.