Flowers are nice and chocolates are sweet (pun intended), but few things are as sentimental and appreciated as a handmade gift. If you’re looking for DIY projects to surprise someone you love this Valentine’s Day, consider making this rustic farmhouse craft that’s good for the spirit, sustainable and a simple way to add beauty to your wall decor.
Our new project this month is all about showing friends or a family member love — a beautiful rustic wood heart mounted on a sturdy background that serves as a pretty piece of wall decor. Additionally, this rustic wooden heart boasts dimensions that size up well when you want to use the basic project instructions to make a headboard. Alternatively, add pegs to the wood heart and you’ve got a place to hang coats and keys in the entryway or display a few ladles and spatulas that don’t fit in drawers in your kitchen.
You may need a few extra tools for our wall decor craft this month, but many hobbyists should have all the necessary gear in their garage or basement already. Any additional equipment you require to complete our wood hearts home decor project should also be a good investment for numerous wood and reclaimed wood DIY projects to come, whether you use them to create everyday handmade goods, Christmas decorations or even driftwood crafts.
Step One: Gather Your Materials and Tools
Just like cooking, you need to get all your necessary items together before you get to work on your hanging wood hearts. Things you need to complete this rustic farmhouse art project “recipe” that adds charm to your home decor include:
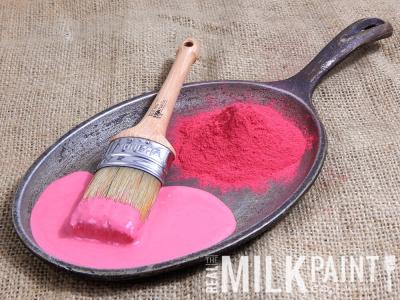
- Real Milk Paint in three colors: Soft White, Sweetheart and Flag Red*
- 1 pallet (we recommend using a second pallet to cut on)
- Wood glue
- Jigsaw
- Trim or finish nailer
- Nails
- Square
- Pencil
- Measuring tape
- Hammer
*Feel free to customize your wood hearts with your favorite colors to match your loved one’s preferences, your existing wall decor or the holiday season.
Step Two: Break Down Your Pallet
Pallets are the workhorses of the crafting world because you can use them for so very many things. In fact, anytime you see a pallet set out on garbage day or offered up for free on a sale site — grab it! These reclaimed wood gems are easy to break down, too, but be sure to put on some safety gear to reduce injury risks from splinters and hardware. Just gear up with some tough gloves and goggles, then use your hammer to knock off the back blocks and detach the top planks. Finally, remove all the nails and you’re ready to create a rustic farmhouse masterpiece with the reclaimed wood pallet.
Step Three: Form the Backboard
 Glue together the cross supports for your backboard to make your project stronger and give you an easier way to lean or hang your finished piece. Depending on how big you want your finished product to be, trim down your pallet slats as necessary, then nail them side by side to the cross supports. Let the glue dry and move on to painting your rustic wood heart project components.
Fun Fact: Wood glue sticks to our Real Milk Paint! Because milk paint is porous just like wood, it’s OK to paint both sides of the board and glue afterward.
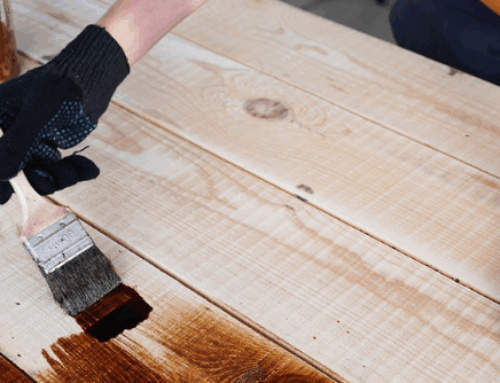
Step Four: Paint and Cut Wood Pieces
Now you’re ready for the artistic part! First, mix up your milk paint — you want to make a Sweetheart, Flag Red and Soft White wash, so aim for a roughly 2:1 ratio of water to powder, mixing each color in its own container. Once the foam dissipates from the mixing process, apply the milk paint to your pallet slats. Let the reclaimed wood dry, then cut your painted slats into random triangles. You can be as exacting or free-form as you like — get creative with your design ideas and experiment! We used different-sized triangles because the more sizes you have, the easier it is to later reassemble your pieces into the finished heart shape.
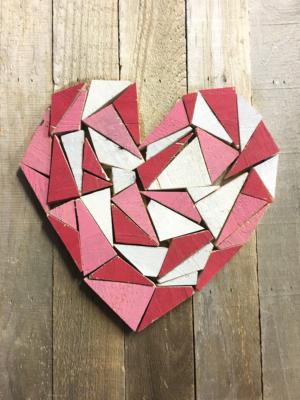
Step Five: Assemble Your Rustic Wooden Heart
Finally, arrange your triangles into a wood heart shape on your backboard. You can do a rough sketch of the rustic wood heart shape on the backboard to help in preserving the form as you secure each individual component. To do this, lift the handmade pieces up one at a time, apply glue to the backs, then stick each one to the backboard, alternating colors to create a lovely dimensional effect that complements your rustic wall decor. Lastly, let your DIY wood heart dry, then you’re ready to mount this Valentine’s Day project within your home decor.
Alternative DIY Projects With a Rustic Wood Heart
Not just for Valentine’s Day, this rustic wood heart project offers a versatile way to spruce up your home decor with reclaimed wood crafts. For example, changing out the Sweetheart Real Milk Paint hue in the original project supplies list with Lily Pad green lets you create a rustic handmade holiday sign or personalized Christmas decorations. Likewise, adding lovely details and even text via techniques like wood burning further personalizes the design to match your hanging wall decor or gift recipient.
Ideas for Rustic DIY Wall Art Projects
 The categories of DIY arts and crafts you can make with this tutorial run the gamut from a fun sign for fall and easel-style table accessories to chic wedding decor and adorable coastal-chic designs. Consider ideas for alternative DIY projects, crafts and details if you can’t wait for Valentine’s Day to roll around again:
- Arrange the wood pieces in the shape of a Christmas tree to craft cheery winter signs
- Position the triangles into leaf or pumpkin shapes for rustic signs celebrating autumn
- Cut the shapes into squares, replace Sweetheart with Lakeview Blue, then arrange pieces into a flag for fun Fourth of July wall decor
- Shape seashells on the backboard in the shape of a ship for airy beach-themed wall decor
- Screw easel-style hardware to the cross supports to make a customized tabletop sign
- Keep the project in its original condition, but use a wood burner to add the happy couple’s name for rustic weddings
No matter how you ultimately decide to complete this DIY wood hearts project, the total price shouldn’t break the bank thanks to using reclaimed wood and economical Real Milk Paint products to add color to and whitewash your design elements. In fact, we’d love to see the fine details and cutting edge style you add to our basic DIY project and hear about how it adds personalized charm to your wall decor.