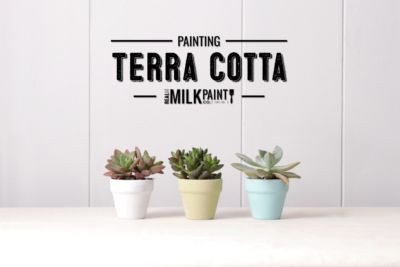
 Indoor potted plants offer a number of benefits, from reducing carbon dioxide levels to easing stress. And of course, they add beauty and interest to any room in the home. Unfortunately, those cheap plastic planters do little to beautify your indoor spaces. Rather than potting your plants in an unnatural plastic plant container, we recommend making these simple yet eye-catching terracotta succulent plant pots.
DIY Planters to Stow Your Succulents
Not blessed with a green thumb? Beautiful and resilient, succulents are one of the easier plants to grow. Because they retain water, succulents can survive even if you forget to water them on occasion. And, since they come in countless colors and varieties, you’re sure to find one to complement your home decor.
At Real Milk Paint, we love incorporating succulents into our home design through creating beautiful succulent planters. Your small succulent can look good in ceramic pots, a bamboo tray or a clay pot. Today, we created this video about painting terracotta succulent pots.
Read on for a step-by-step guide to DIY plant pots for your succulents:
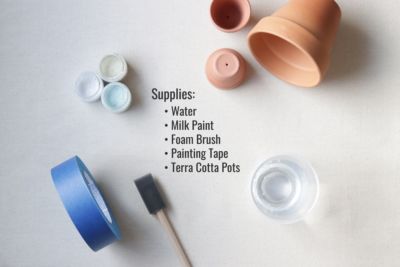
1. Gather Your Supplies
To get started, you’ll need one or more terracotta pots, ideally with drainage holes in the bottom as this drainage hole allows excess water to escape. You’ll also need hot water, soap, and the milk paint color of your choice. If you’re painting inside the house, you might want to purchase a tarp or drop cloth to avoid staining your floors by accident.
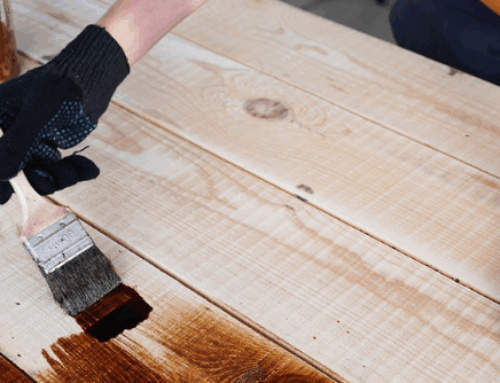
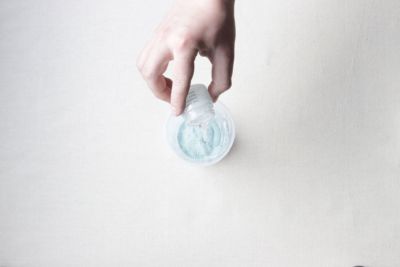
2. Mix Your Paints
We recommend choosing a bold shade for your succulent pots, like our fall-fruit-reminiscent Persimmon or this month’s featured color, the coolly inviting Dragonfly. However, you can create an eye-catching succulent planter in just about any shade. After pouring your paints into a bucket or tub, use a paint stirrer and mix from the bottom to the top.
3. Apply the Tape
Want to add some extra interest? Use tape to create a pattern on the face of your succulent planter. If you go this route, remember to let the paint dry thoroughly before removing the tape out of your little pots.
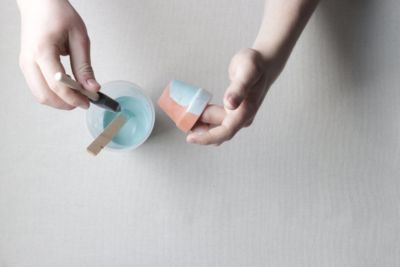
4. Paint Your Pots
Apply multiple coats of milk paint, depending on the richness and depth of color desired. Because our paints are porous and breathable, your succulent pots will continue to absorb and release moisture after the painting process is complete. That means your small succulent plants will get the oxygen they need to grow and thrive.
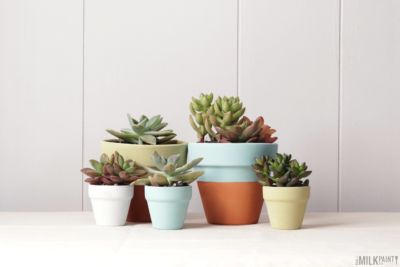
5. Plant Your Succulents!
Once the paint is dry, you can get started planting and growing succulents. Then, all you have to do is decide where to place them in the home. These small succulents doesn’t take too much space so they can fit perfectly on your window sill, on a shelf or at the center of a table.
Contact Real Milk Paint for More DIY Tips
Committed to preserving the health of our customers as well as the environment as a whole, Real Milk Paint Co. has been providing high-quality, powdered milk paints since 1995. Free of VOCs, our non-toxic products are safer for both children and pets. You can feel good about using this paint on your walls, furniture, and accessories.
Ready to give your home an upgrade? Find a Milk Paint retailer in your area or contact our team for more information. We look forward to helping make your life a little more colorful!