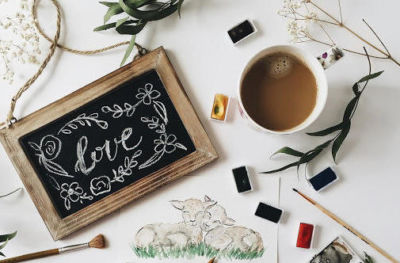
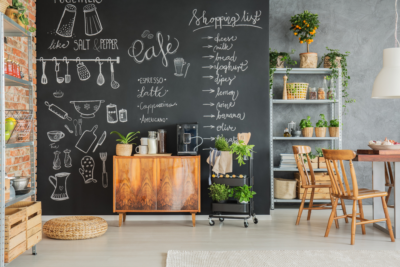
 DIY chalkboard projects and crafts are seemingly everywhere these days, and there’s a good reason why: they’re a fun home improvement project. Whether you plan to use your project as an easel for kids’ playrooms, a to-do list board for the kitchen, or giant chalkboard wall art for the living room, DIY chalkboards bring an interactive element to your home by providing entertainment for kids and functionality for adults. Read on to learn how Real Milk Paint can help with your DIY projects when you want to turn ordinary surfaces into chalkboard surface masterpieces.
How to Make a Chalkboard With Real Milk Paint
Put darker hues of leftover Real Milk Paint to work for a little DIY project or pick and choose specific shades to match your task. No matter if you want to repurpose an old cutting board into a chalkboard frame with a practice slate for little ones to learn their ABCs or make your pantry door into a floor-to-ceiling message center, Real Milk Paint has your DIY chalkboard project covered. Custom consistency and coverage means you don’t need a tinted primer when using our Real Milk Paint as your chalkboard paint.
Here’s our how to make a chalkboard tutorial for you:
Pick Your Wooden DIY Project Piece
 Maybe you have an old piece of furniture or a slab of reclaimed wood at home all ready to go that you can cover in chalk paint. Perhaps you want to create a large DIY chalkboard wall. If that’s the case, great! You’re ready to prep your chalkboard frame. If you don’t have a piece in mind, however, you’ll need to go foraging to find one. Antique shops, thrift stores, flea markets, garage sales, local home improvement store, and even your neighbor’s curb can all lead to fantastic farmhouse-style treasures to complement your home decor at a great price.
One thing to consider in your search is the stability and quality of the piece to ensure you achieve your great idea easily. Keep your eyes open for pieces that are structurally sound or only need a little work such as: tightening up hinges, replacing a screw or two, or securing loose details with wood glue. Anything unstable or crumbling on the edges is likely more trouble than it’s worth, especially if you want to create a large DIY chalkboard. Also, look for strong frame pieces to ensure the perfect contrast between the wood and your DIY chalkboard.
Here’s a quick hint: Softer woods are more porous, which can lead to wood compression and create an uneven surface that smudges writing on your DIY chalkboard. This means that if you want more legible results, harder wood is a better option for your chalkboard paint project if you want to use it for writing notes to your family in the kitchen or dining room or to create a permanent calendar that keeps everyone on track for appointments.
Prep the Surface for Real Milk Paint Application
 Prep a surface for milk paint by removing all dust and debris with a slightly wet rag. To ensure the chalkboard paint stays put on your surface, add a bonding agent like Ultra Bond Adhesion Promoter by the Real Milk Paint Co. to ensure quality results on project pieces that already have paint or sealer on them. You may also want to sand the wood on your piece if you have an item that’s a little rougher around the edges than you’d like. If your wood piece has any unwanted damage or dents, this is the time to fill those marks with a wood filler.
Pick Out Your Real Milk Paint Color
Most modern chalkboards are some shade of black because the dark surface provides the perfect contrast for light and white chalk. Real Milk Paint’s Arabian Night color offers a blue-black reminiscent of the night sky that works brilliantly in DIY chalkboard projects. Black Iron milk paint — a smokier, carbon-inspired hue — also makes a brilliant idea for chalkboard paint.
For a more vintage look or to create a rustic vibe, a DIY chalkboard that’s a bit more green provides a look a little closer to the classic schoolroom models. Earth Green paint is a good option if that’s the design you’re going for, or you can add a bit of black to any shade of our green milk paints to create a custom dark paint color that matches your vision.
Mixing and Enhancing Your Chalkboard Paint
Mix up your paint according to the directions. This is probably the easiest part, so don’t be afraid to make extra. If you have any leftovers, the premixed milk paint should keep well for at least a couple of weeks. Real Milk Paint typically mixes at a 1:1 ratio with water, though you can change up the consistency to match the needs of your DIY chalkboard project by mixing it with more or less liquid. For example, raw wood is known for soaking up a lot of paint, so you may want a thinner consistency to ensure even absorption.
After mixing your Real Milk Paint with a paint stick, wait for the foam to dissipate before you start your painted chalkboard project. If you’d rather get started sooner, add our Anti-Foaming Agent during the mixing step, which lets you use your mixed Real Milk Paint immediately. Also, if you want to use your chalkboard paint project on a porch, patio or deck, consider adding our Outdoor Additive to the mix as well during the mixing step.
Applying Chalkboard Paint to Your Chosen Surface
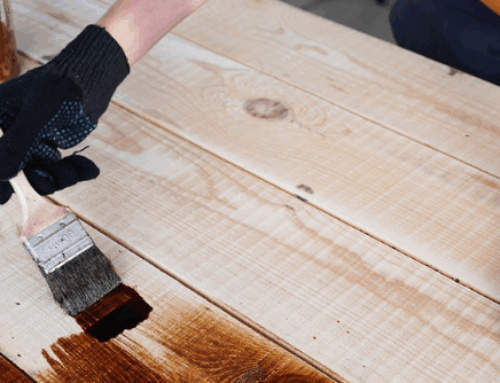
Now that you’ve chosen your piece, prepped it and mixed your Real Milk Paint, it’s time to apply the dark paint you chose for your DIY chalkboard. First, use painter’s tape to protect any areas you don’t want painted. Since you can change the transparency levels of Real Milk Paint by adding more or less water to the mixture, you don’t need a tinted primer to complete your DIY chalkboard.
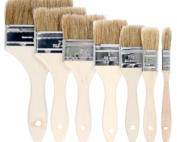
Next, use a clean, lint-free paintbrush to apply your first coat of paint to the whole thing, you can also use a foam roller or a paint sprayer if the area is too large. It’s up to you how many coats you ultimately need, though a second coat is always necessary and typically two coats is what you need if you’ve thickened your milk paint for maximum opacity, but no matter how many coats you add, you should let each one dry completely before adding another. By letting each of the coats dry completely, you can better gauge the chalkboard paint coverage as you go.
Finishing and Seasoning Your New Chalkboard
Next, you need to seal the dry milk paint with a sealant, both to keep moisture out of your DIY chalkboard and to preserve your surface against ordinary wear and tear. Because you intend to use the surface as a DIY chalkboard, you also need to make the surface suitable for writing. To do this, use fine-grit sandpaper — we favor a 400 grit, but feel free to experiment — to remove any bumps, drips, and stray sediment.
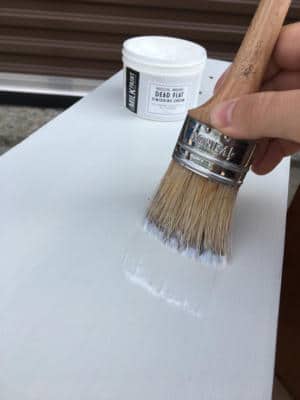
Finally, it’s time to add your sealant. First, wipe the chalkboard paint you added down with a damp cloth or wet paper towel to remove any sandpaper debris. Next, rub the painted surface down with our Low Sheen Finishing Cream, then wipe the surface with a clean, dry rag while the sealant is wet to keep the surface smooth, since you don’t want brushstrokes on your DIY chalkboard.
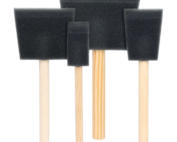
Once the entire board is completely dry, add a coat of Clear Carnauba Wax to the chalkboard paint surface using a sponge brush, then buff when dry. This paste wax should make the surface slick and smooth, enabling chalk to glide easily across the surface. Typically, we recommend that you allow the paint to dry 24 hours before writing on it with a piece of chalk. Refresh your chalkboard any time with a few new coats of wax.
Now that you know how to make a chalkboard using Real Milk Paint, the sky’s the limit for what you can do with what you’ve learned. Use this simple process for everything from making miniature chalkboard gifts for holidays, transforming a whole space on playroom walls for artistic endeavors or even making a quick-change adult and child menu for your dining room or restaurant.
Have you done a DIY chalkboard? We’d love to see!