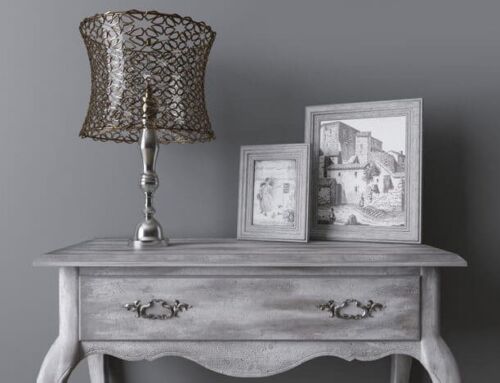
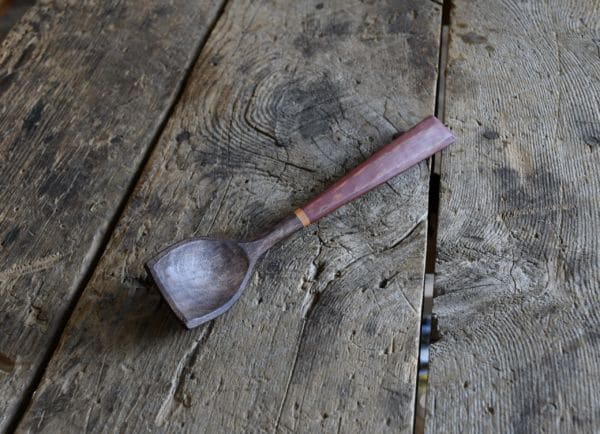
 Hand-carved spoons make a great gift, and spoon painting offers a sustainable way to express your creativity. Part of the green woodworking movement, these innovative pieces reflect not only the skill of the carver but also the artistic acumen via decorative elements. From whittled edges ideal for burnishing to gouged-out lettering perfect for painting in contrasting color, hand-carved spoon making can be as simple or complex as the artist’s whimsy, providing ample opportunities to create fashionable yet functional pieces that hold up equally well to display in the dining room and use in the kitchen.
Advantages of Spoon Painting with Real Milk Paint
The main advantage of using Real Milk Paint for your spoon painting projects is that this medium for green woodworking is completely food safe. Made from all-natural, organic ingredients, including milk casein, Real Milk Paint has a non-toxic formulation that contains no volatile organic compounds (VOCs) for fuss-free spoon painting in areas without ventilation. This versatile medium comes in a powdered format that blends with water, letting you mix the correct amount for the task at hand right when you need it. Mixed Real Milk Paint lasts for up to two weeks in an enclosed container, giving you a chance to use the color and reducing potential waste.
Supplies Necessary for Wooden Spoon Painting
Prep your arts and crafts space by placing a drop cloth over the surface you plan to use for your spoon painting project. Next, gather essential supplies, including:
- Wooden spoons
- Real Milk Paint powder and water
- Fine-grit sandpaper
- Flat paintbrushes for coverage
- Round and liner paintbrushes for detailing
- High-quality painter’s tape
- Food-safe sealer for finishing
- Clean cloth or rag
- Baking soda (optional)
Choosing Wood for Spoon Painting
Different woods have different colorations and grain, whether used in spoon painting projects as is or soaked in baking soda and water to achieve unique effects. Woods like magnolia have a low tannin content, so they bleach easily when soaked in a mason jar with 2 tablespoons of baking soda and water. Higher tannin woods such as cherry and maple require more soaking time, with up to 2 hours needed to lighten the coloration and reveal the beauty of the wood grain beneath. Ash wood tends to turn a swampy green when coated with a baking soda and water poultice, making it a great choice for decorative spoon painting projects. If you’re unsure how the wood you’re using can handle soaking before spoon painting, soak a few chips you shaved off during the carving process to see how they turn out before committing your entire project to this technique.
Baking Techniques for Spoon Painting Projects
Many artists bake their spoons in the oven before painting to bring out the dark color. Keep in mind, however, that baking doesn’t get rid of the lines in wood but does sometimes spoil the look of fine wood grain. Also, if you soaked your raw wood spoons, be sure to let them dry out completely before baking to prevent cracking due to leftover moisture in the material. Baking dry wood spoons for 30 minutes at 375°F typically does the trick when you wish to darken the spoon a bit more than with just a baking soda soak, but check often near the end of the timer to ensure the back doesn’t burn. To be sure you don’t scorch the bowl edges, consider covering them with tinfoil during the first 20 minutes of baking time.
Adding Unique Effects to Spoon Painting Projects
If you find your spoon painting project needs something extra or want a fun way to cover up minor mistakes, consider adding unique effects by using a variety of green woodworking techniques. Burnishing, or polishing wood with another piece of wood, helps you achieve a high-shine look without the use of shellac or varnish, while ebonizing the surface with a black tea, then soaking it in an iron and vinegar mixture, adds a rich black finish to your design. You can also carve detailing or lettering into the surface during this step, then use a fine liner paintbrush to detail the area with Real Milk Paint that contrasts with your base hue.
Painting Wooden Spoons With Real Milk Paint
When you’ve achieved the color you want, it’s time to prep for spoon painting. Begin by masking off areas of the spoon you don’t wish to color with painter’s tape. The higher the quality of painter’s tape you use in this step, the less bleed-through you risk, so keep that in mind when purchasing spoon painting supplies. Next, grab a couple of small containers and start combining Real Milk Paint powder with water, then mix the colors thoroughly using a paintbrush. Different consistencies work better for covering broad areas of your spoon or creating fine details on the handle or bowl. After adding your first coat, allow the colors to dry or use a hairdryer or heat gun to get faster results, then brush on a second coat. Once you get the look you want, allow your spoon painting project to dry completely. After the paint has dried completely, some carvers choose to burnish the handle with a stone or paper bag to smooth out the texture of the paint.
Sealing Spoon Painting Projects for Durability
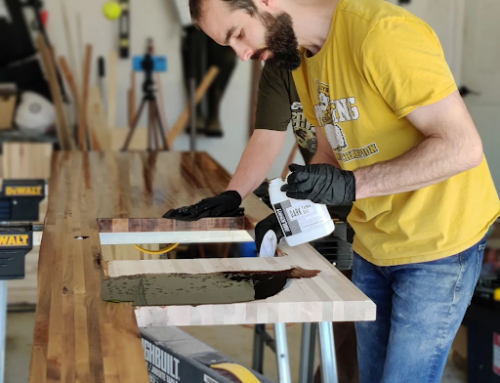
Whether you plan on giving your hand-carved treasure to a friend or family member, displaying it within a floral arrangement in your dining room or using it as a functional kitchen utensil, sealing your spoon painting project is extremely important. Fortunately, the Real Milk Paint Co. has you covered with food-safe options such as our Half and Half Oil and Wood Wax. Applying our oil finishes requires only wiping on the oil, allowing it to soak in, then reapplying in this fashion until the wood won’t hold any more oil. Our wood waxes are even easier to apply — just give your spoon painting project a quick once-over with the wax paste on a clean, dry cloth and you’re done. Note that both our oil and our wood wax products typically cure for light use within 7 to 10 days and fully within 30 days.
Green woodworking helps you feel good about the sustainability of your projects, and spoon painting provides a unique way to show off your artistic flair. Products from the Real Milk Paint Co., including 56 beautiful Real Milk Paint colors, help you put gorgeous finishing touches on any number of green woodworking projects without compromising on their sustainability and eco-friendliness.
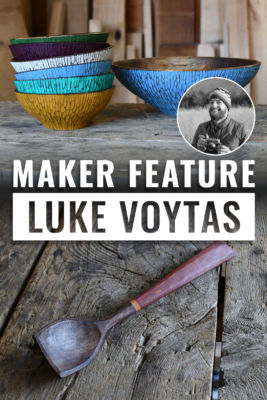
Meet A Maker
To learn more about what custom wood builders can do for you, we’ve interviewed Luke from Luke Voytas Woodworking to find out what he enjoys most about creating items for customers and the products he uses to make those items look their very best.
What is your business or online name?
If you had to give a summary of who you are and what you do, what would that be?
I’m a woodworker based in rural Kempton, PA. I hand make items for the kitchen and home from local hardwoods using traditional tools as well as modern equipment when it’s practical. I hope to make work that enhances people’s every day experience of ordinary things like cooking and eating while reminding them of their connection to the natural world.
Could you explain your journey in how you came to be in the craft/trade that you are currently in?
I was always interested in woodworking and building. As a toddler, I carried around a plastic hammer and my mom would stop in front of construction sites so that I could watch the “Working Men”. I studied sculpture at Alfred University focusing on wood and metal. As a student, I began working for a local timber frame company. It was a lot of fun and I learned a lot! I continued my art practice after school and eventually ended up running the shop and teaching at Alfred. In 2018, I took a job as Wood Studio Technician at GoggleWorks in Reading, PA, near where I grew up. It has allowed me to be closer to friends and family gives me more time to make my own work.
What is your favorite part about your craft/trade?
I like being able to repurpose trees and give them a second life in people’s homes. I use material that’s fallen in storms or that I remove from friends’ property when it threatens homes or becomes a nuisance. I like discovering the personality of each tree and piece of wood that I use. It’s a great pleasure to reuse this wood and celebrate it’s beauty in a handcrafted item that enhances people’s everyday experiences.
How did you find out about Real Milk Paint Co?
I found Real Milk Paint through Instagram. As I was becoming interested in spoon carving I saw others using milk paint. I looked into Real Milk Paint and was impressed with the wide selection of colors and the easy to use website. I was also pleased to support this family business and got the sense that I knew the people and their process through their social media.
What is your favorite project to do with our products?
Turned, carved and painted bowls are my favorite project to make with milk paint. Bowls are my favorite to make generally, and combining different carving techniques with various applications and colors has been fun and helped expand the range of products that I make.
Do you have a particularly favorite product of ours? If so, what would be one tip/trick to offer to others that you have found produced great results?
I came for the milk paint and that’s still my favorite offering. It’s so versatile and permits so much experimentation. Try layering and sanding through the paint for different effects.
If you had to give one tip to those looking to “follow in your footsteps” what would it be?
Failure is important to learning. I have lots of items laying around that just didn’t quite work. Don’t dwell on it or become fixated on what went wrong. Make something new and try again.
Where can people see your work or contact you?
@lukevoytas
Products Used:
Milk Paint: Deep Saphire, Barn Red, Lily Pad, Parchment, Stone Blue, Navy Blue, Sunflower, Goldenrod, Spearmint, etc., Anti foaming agent, Half & Half, Wood Wax