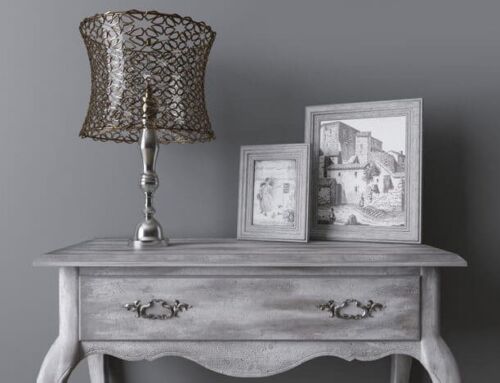
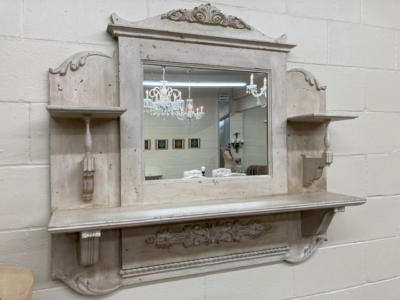
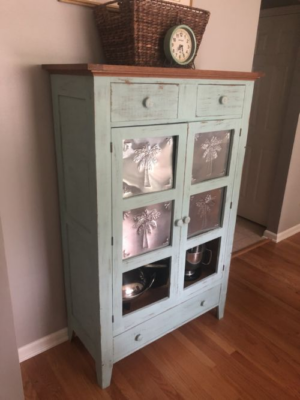
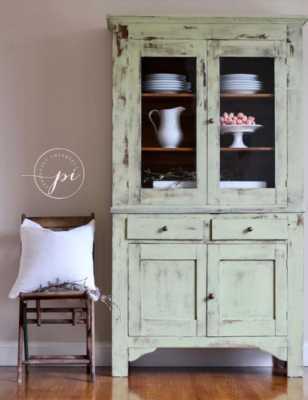
If you want to add a touch of farmhouse style, and rustic charm to your home decor, there’s no better way to do it than by up-cycling or refinishing a piece of furniture with milk paint in a rustic painting technique.
To us, rustic style encompasses a laid-back look with warm, natural materials, weathered or distressed wood and a creative, do-it-yourself attitude. Learning how to distress furniture or a raw wood surface is a fantastic way to give secondhand pieces new life and turn generic finds — like those you might score on sale at a big box store — into one-of-a-kind painted furniture masterpieces.
Rustic painting the furniture can result in a shabby chic or chippy painted wood appearance once finished, achieving that weathered wood look you always desired. This process is accessible even for complete beginners, with success depending on just three key factors: using the right equipment, following the correct process, and maintaining the right attitude throughout the project.
What You’ll Need Before Getting Started
Here’s your DIY project wish list:
- Two different colors of milk paint for several layers of application. Choose an underlying milk paint color and a top coat of paint color. The underlying color will be exposed slightly on “worn out” areas. For an eye-catching, vibrant look, choose contrasting colors (for example, salmon and moss green for a touch of country chic or fuchsia and turquoise for a bohemian-meets-modern effect), or opt for two colors in the same family (like a Blue Spruce paint color and Beach Glass color) for a subtler result. You can also opt for white paint or another color. Using white paint on your old furniture is perfect for achieving that chalky, slightly distressed wood look.
- Paintbrush (any natural bristle dry brush works well)
- Lint-free rag and bucket of water
- Burnishing paste (low-sheen)
- Sandpaper or sanding block (optional)
- Steel wool (optional)
Step By Step Rustic Painting Technique
- Clean and prep surfaces, unnecessary wood stain and dirt would also be removed. Then you can mix the Persimmon paint base color.
- Blend equal parts or the desired amount of paint and water by hand or with a hand or shake mixer. If you plan to use the paint you mix right away, add a few drops of anti-foam, which also reduces spatter from hard water. If you mix the paint the night before your project, the foam and chunks naturally dissipate.
- Grab a natural bristle dry brush and apply the paint to the now clean and bare wood. Coat the recessed and beveled areas first, brushing Real Milk Paint along the wood grain, then extend the color out to the edges.
- Add a second coat, then allow it to dry completely for a few hours. This process sometimes raises the grain, and requires you to sand the wood afterward to remove it for a smoother finish.
- Let the Persimmon undercoat dry overnight.
- The next day, add the color Willow. Apply this coat just like you applied the Persimmon layer, working on inner surfaces first, then moving to the outer edges.
- Once applied, let it set 20 – 30 minutes. Then use a damp cloth to start wet distressing. Real Milk Paint has a long open working time, so you can make changes, sand and remove it from surfaces as needed, though that gets harder when it’s drier.
- Add distressing with dry brushing or a damp cloth you’ve wrung to the point that no more moisture comes out of it. Simply rub away the top layer and reveal the Persimmon paint beneath. To achieve a realistic effect, focus distressing around areas where people normally touch kitchen cabinets or rub them during cleaning, like the outer edges and around hardware.
- Once you get the look you want, seal over the top with a coat of Low Sheen Finishing Cream. This forgiving acrylic formulation offers a consistent finish without halos, rings or chalkiness, and it also makes the item more washable. Work this paste into the paint to the point that it no longer spreads, let it dry overnight. This provides you with a nice color without too much shine or a built-up look. Another option for sealing Real Milk Paint is our Hemp Oil or Clear Soft Wax.
Get a Distressed Look With These Rustic Painting Techniques:
To distress wood and achieve the most authentic rustic paint look, read our professional tips here:
Work in natural light.
Too little light and you can easily end up with an over-distressed wood piece, and it’ll look beat up and unsightly. Too much light and you won’t have an accurate picture of what the piece would look like in a normal indoor setting.
Go slowly.
The best distressing is done in layers. Add a scuff here, rub a bit of paint off there, and then reevaluate. You can always distress wood further, but undoing your distressing technique efforts requires repainting, and that’s not a cycle you want to get into.
Focus on the big picture.
As you distress wood, keep stepping back to look at your project piece as a whole. You want to see how all the marks work together to create a cohesive whole. Balance is important; vintage wood furniture doesn’t get worn down on one side and stay nearly pristine on the other, but don’t get bogged down in symmetry either.
You can combine so many styles.
Use a combination of the wet rag method and sanding, or play around with both, or even add the dry brush technique. Sanding with grit sandpaper can be harder to control, but you’ll strip the paint quicker and be able to go deeper. On the other hand, using the rag allows for greater finesse.
Find the beauty in the imperfections.
There’s no better time to embrace mistakes than when you’re playing with paint and distressing. If you have an oops moment, roll with it. You may end up loving the results.
 Voila! With a few key tools, a bit of advice and a decent amount of elbow grease, you’ve created a one-of-a-kind piece of distressed furniture that adds character and charm to your home. Now, what will your next furniture makeover project be?
For a step-by-step visual guide on how to make furniture look rustic, check out our paint technique video below on how to distress furniture using Real Milk Paint.
Distressing Techniques with Real Milk Paint®
Video Instruction:
|